Choosing the right concrete pad for a Garage Build

At Venkor Group we strive to provide our clients with the best possible real estate assets, that's why we would like to share our experience with choosing the right specifications of the garage pad for Calgary and the area.
The concrete garage foundation is the most essential part of the building as this is what holds the entire building together and it is important to get it right. At Venkor Group, we use a ready mix of 32 MPA for the standard 5" garage pad, 7" curb walls, 10 mil rebars, and vapour barrier. We also do control joint cuts to ease the foundation settling so that the concrete pad serves longer. For more garage specifications for Calgary winter please visit our Calgary Garage Builder page.
First stage - Earthworks and site preparations:
At the very first stage, the garage footprint should be prepared, whether it's 20 x 22 or 24 x 24. The entire footprint where the foundation will be placed should be stripped until the "clay" is roughly up to 7 inches. At this stage, the soil is removed with a bobcat or a piece of similar light machinery.
Second stage - Subbase:
Once the soil is removed, the subbase should be delivered and spread out using the same bobcat. The amount of the subbase should be carefully calculated to allow at least 3 inches of the subbase throughout the entire footprint. At this stage, you should carefully measure the high and low points. To accommodate the 2% slope for the concrete pad you should calculate the difference between the back wall and the front wall of the garage. For instance, for a 24 x 24 garage, you should allow at least 4.5 inches of difference between front and back. Geodetic levelling comes in handy at this stage. It is crucial to pack the subbase either with a packer or bobcat with tracks.
Third stage - Concrete Forms:
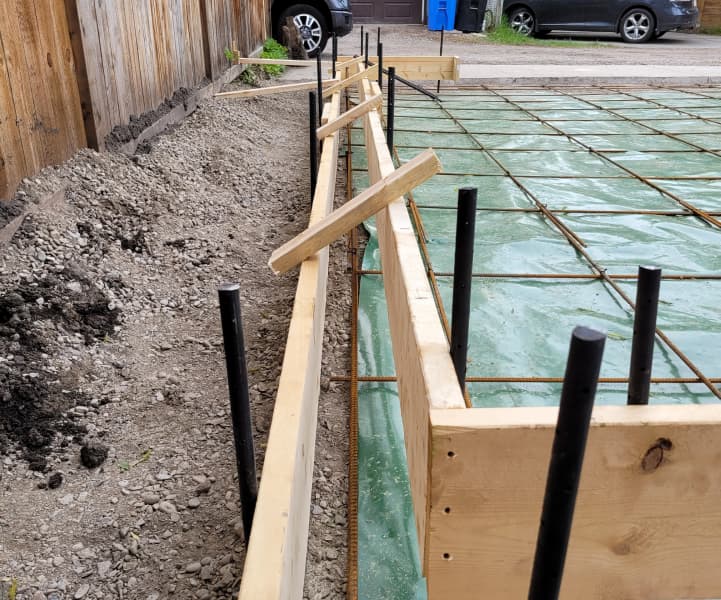
Once the subbase is done and levelled the next stage is concrete forming. Forming for the garage pad is usually done with standard lumber: 2 x 4, 2 x 10, 2 x 6. First, you position the outer walls of the curb wall with 2 x 10 lumber, using metal pins only outside of the walls. The inner wall of the curb wall is set roughly 6 inches from the outer wall and also pinned. The 6 inches is the optimal thickness of the curb wall as it works best with 2 x 4 or 2 x 6 pressure-treated plates that go on top of the curb wall for the framing. The pins should be firmly positioned into the ground because once the concrete pour starts the load is quite serious that can break badly secured pins and eventually break the forms.
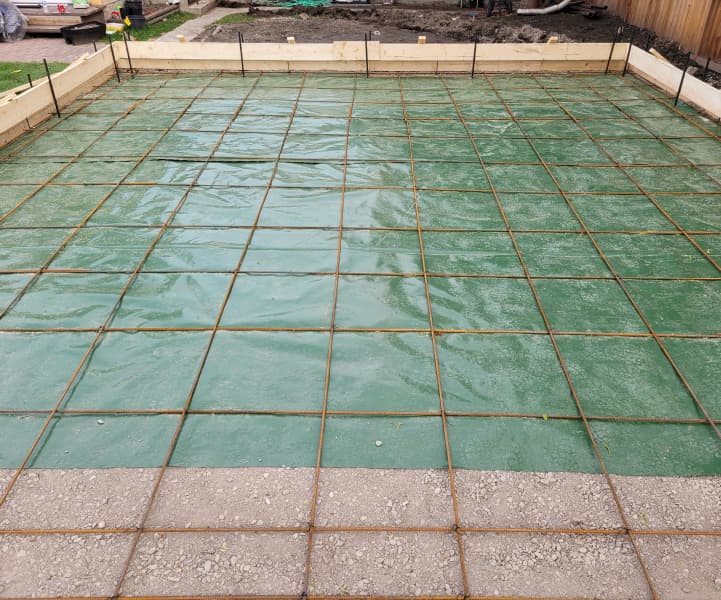
The vapour barrier is placed on the packed subbase with the overlap and then the rebars are placed on top of it. Rebars are usually set at 14" O.C. and tied together in order to provide a solid foundation.
Fourth stage - Concrete Pour:
We recommend choosing a warm and dry day for the concrete pour. The concrete pad finishing should be done by professionals. At Venkor Group, we get our mixed concrete at Burnco and use our finishing subcontractors in order to achieve the best results. The concrete cures for about 4-5 hours on a dry day after which our finishers can continue to buffer the pad and apply the sealant. The control joint cuts are done on the second day after the concrete pad cures. We also recommend avoiding driving on the garage pad for 21 days.
